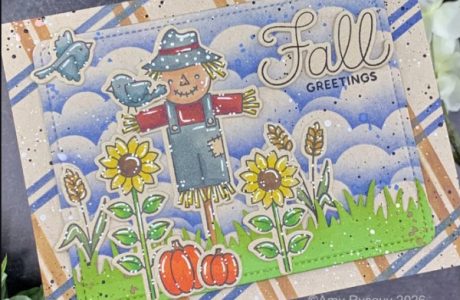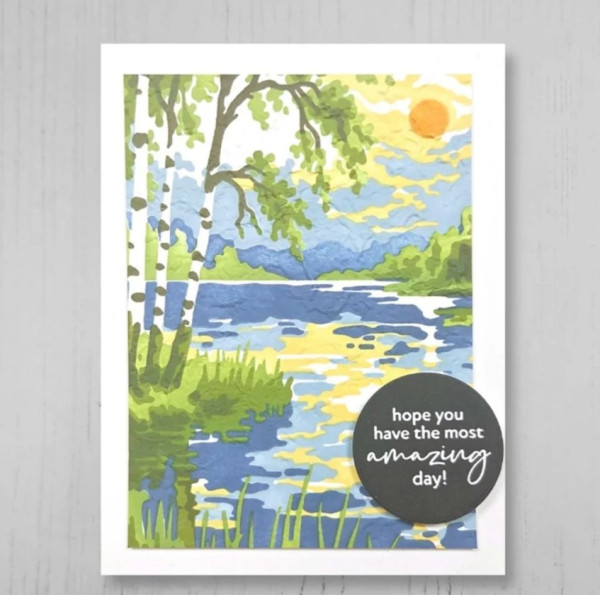
Layering stencils have taken stenciling to the next level with the ability to created detailed scenes and patterns. This stunning card looks like it was water colored but is actually stenciled with shades of blues, greens and yellow ink pads. A simple heat embossed sentiment is all that’s needed to finish the design. Take a closer look at the Altenew blog.
Stenciling on cards has become hugely popular, keeping up with stamping and die cutting as a prevalent technique for card making. And for good reason, stencils are easy to use, inexpensive to buy and easy to store, without taking up much room in your crafting area. You can stencil your entire card design or use them to create parts of a design like backgrounds. If you’re new to stenciling you will need some supplies like colorful ink pads or paste, stenciling brushes or sponges, temporary tape (such as washi tape) and I also prefer to stencil on a smooth cardstock like Bristol. You simply tape your stencil to your cardstock, tap the brush onto the ink pad and apply the ink in soft swirling motions, start with a lighter touch, you can always add more but you can’t really take any away and then carefully lift off the stencil to reveal. Try practicing with scraps to get the hang of it before tackling a big project for the first time. Now let’s take a look at some card ideas using stencils.
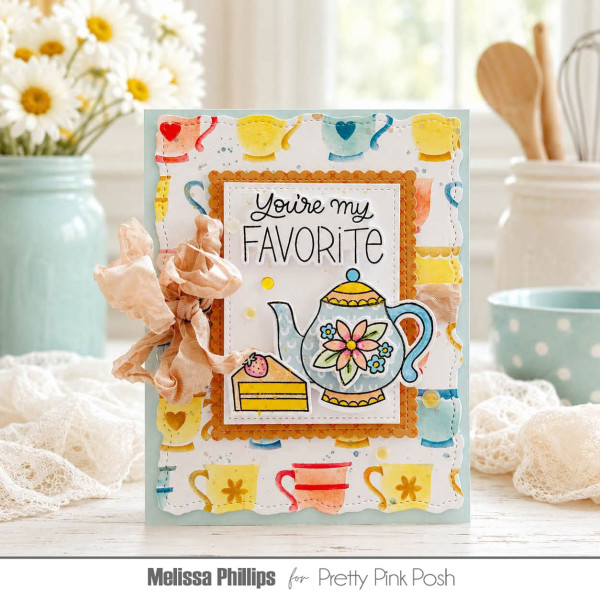
Melissa used stencils to created a beautiful background for her her tea card. She die cut the panel with a wavy edge and placed more die cut panels with stamped and paper pieced images, colored additionally with Copics, over top. There’s also a stamped sentiment and big crinkled bow too. Learn more at the Pretty Pink Posh blog.
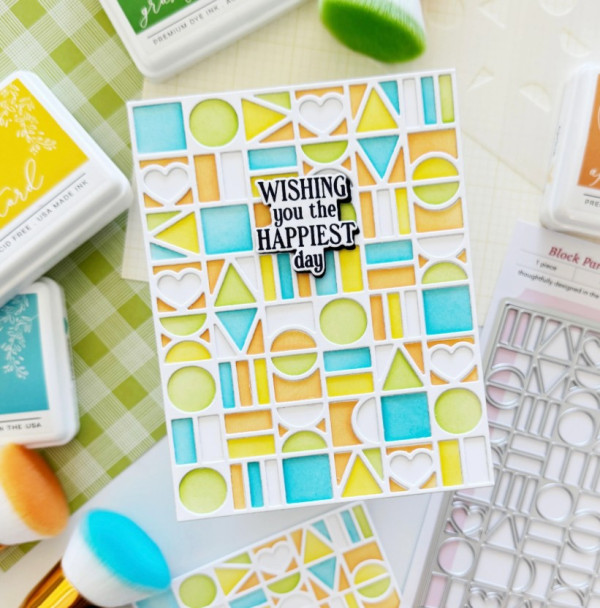
Many companies also make other products that work along with their stencils like stamps or dies. Here Dana used stencils to create a cool geometric pattern in retro colors of inks and then placed the coordinating die cut over top for a fun modern card design. Find directions at the Pinkfresh Studio blog.
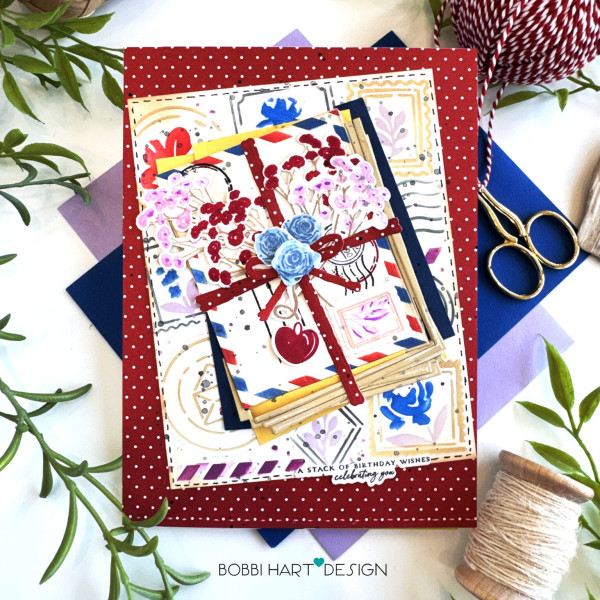
Bobbi’s stenciled card perfectly captures the faux postage craze! There’s a stenciled background of postage stamps and cancellations, all created with stenciling, with a stack of cards and postcards, also all stenciled and then tied with die cut “ribbon”. This card gives a vintage feeling of treasured letters kept for years. Check out her directions at the Papertrey Ink blog.
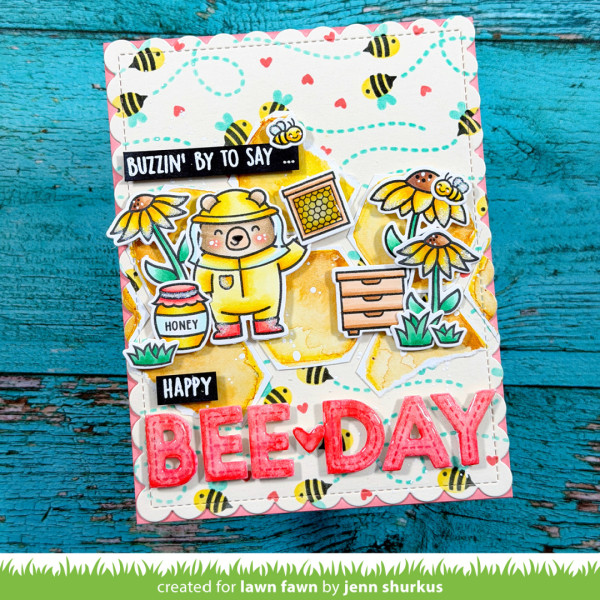
Jenn created two different backgrounds using stencils on her darling Bee Keeper card. The base panel has cute tiny bees buzzing all around, the other are hexagons with a watercolor yellow to look like honeycomb. Her sweet scene was stamped and colored with Copics and the die cut sentiment has Glossy Accents apply for shine. Find all the details at the Lawn Fawn blog.
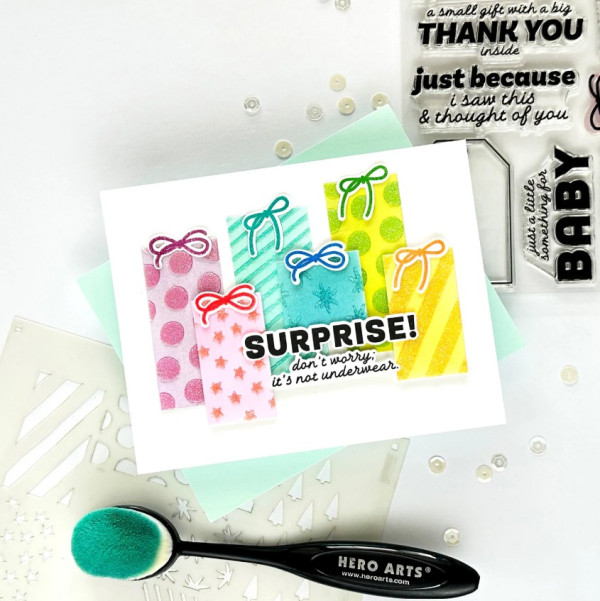
This birthday card adds another layer to the stenciled gifts by using glitter paste over top of the inks to add fabulous sparkle, shine and color. These stencils works with square and rectangular dies and bows to quickly help you create present cards for any occasion. Take a closer peek at the Hero Arts blog.
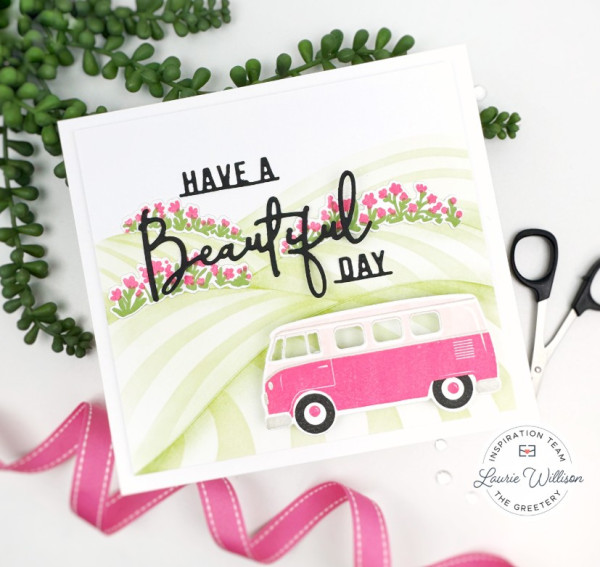
Laurie combined layering stamps and layering stencils for her lovely card. The green rolling hills were stenciled, the flowers stenciled in pink and green and then die cut and the fabulous pink van was stamped. She also added a black die cut sentiment that really pops. She breaks it all down at The Greetery blog.
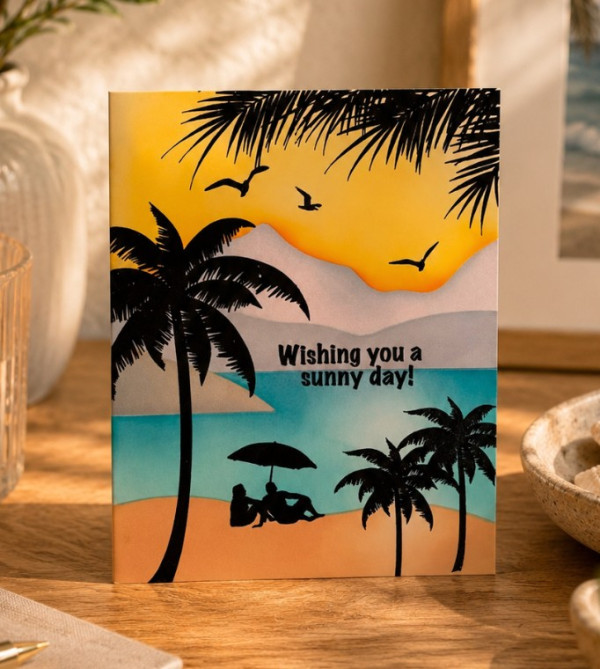
Lori’s card is a Tropical paradise with a layered stenciled beach background with sand, water and mountains. The silhouetted images of the couple, palm trees and bird were stamped in black for a flat, one layer card, perfect for mailing to wish someone Bon Voyage! I spotted her idea on the Gina K Designs Instagram page.
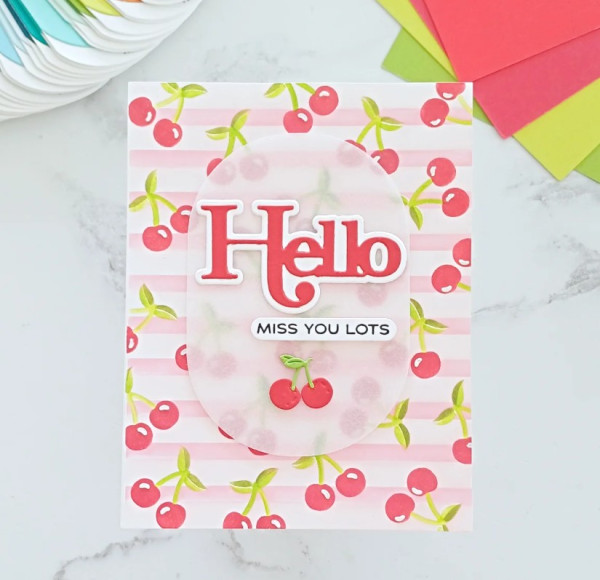
You can get even more mileage from your stencils by combining them. This wonderful design used a striped stencil with a cherry stencil overtop to create a sweet custom pattern. A layer of oval die cut vellum was placed over top and die cut cherries and a layered die cut and stamped sentiment were also included. Find helpful stenciling tips and fixes in an article on the Hero Arts blog.
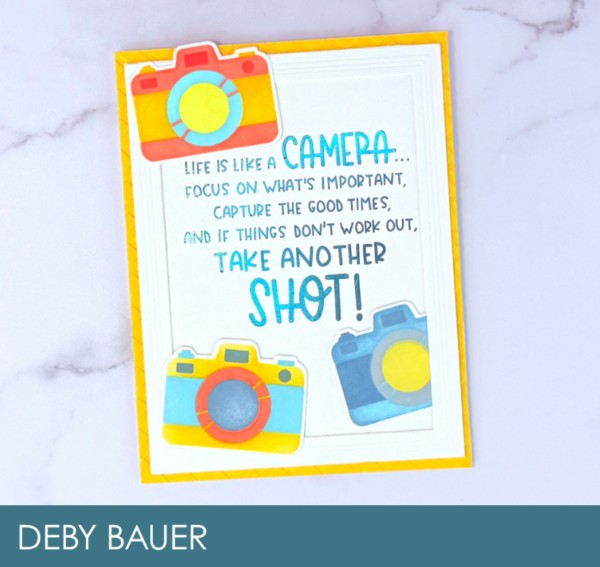
Deby’s clever camera card used a camera stencil 3 times in bright and bold color combination, die cut with coordinating dies. They’re placed on a pre-printed sentiment with a die cut and dry embossed frame with a dry embossed yellow card base. Take a closer look at the Taylored Expressions blog.
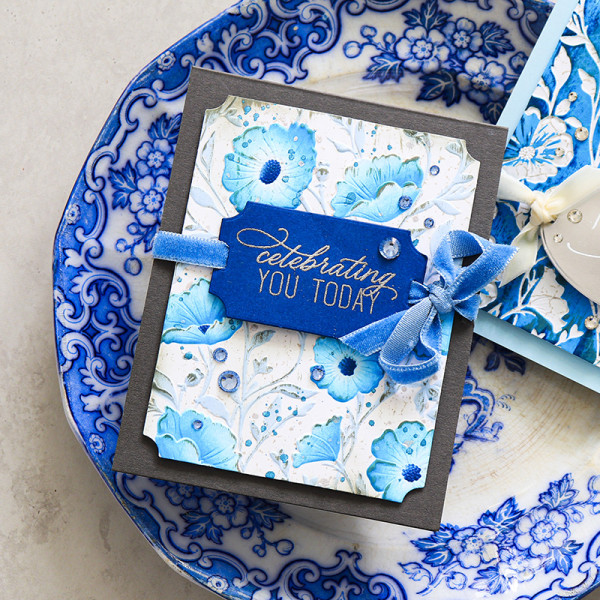
Nina-Marie created a bold, beautiful blue floral card combining stenciling on dry embossing. She added additional texture with paint splatters and sequins too. In the center is a die cut label with gold heat embossing, tied with velvet ribbon. I spotted her idea on the Simon Says Stamp blog.
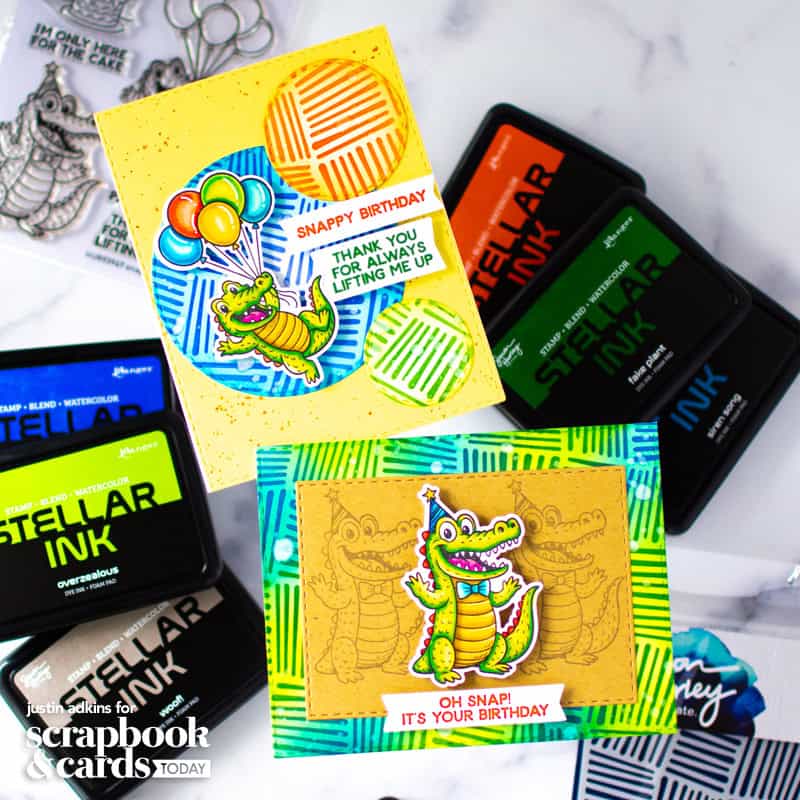
And lastly are two fun birthday cards from Justin. He used the same cross hatch stencil in two ways, one for a background and another as accent circles on the design. His tip was to first ink blend on the card base and die cut circles and then use a darker ink overtop to stencil, then he splatter with ink or water for even more texture. Watch his video tutorial at the Scrapbook and Cards Today blog.
I hope you’ve learn more about the popular techniq of stenciling and will give some of these idea a try on your next card designs!
-Heather
Shop some of these products at our affiliate companies:
You can find Lawn Fawn products here on Amazon and over at A Cherry On Top.