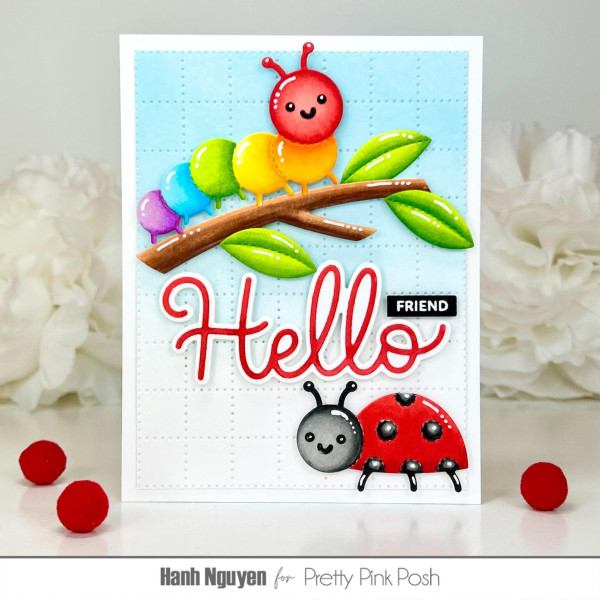
Hahn created a rainbow on a cute Caterpillar by die cutting it from white cardstock and adding the colors with Copic markers. She also included “shine” marks with a white gel pen on both bugs and the branch. The textured background has a subtle blue inking for the sky and there a big red die cut “Hello” too. Learn more at the Pretty Pink Posh blog.
Spring and Summer are the best time to include loads of color on your handmade cards and what better way to achieve that then with all the colors in the rainbow spectrum. It doesn’t have to be a traditional arched rainbow that you always think of, apply all those ROYGBIV colors to your backgrounds, stamped images or die cut lettering for vibrant, cheerful card designs. Let’s take a look at some card that put a bit of a twist on the classic rainbow.
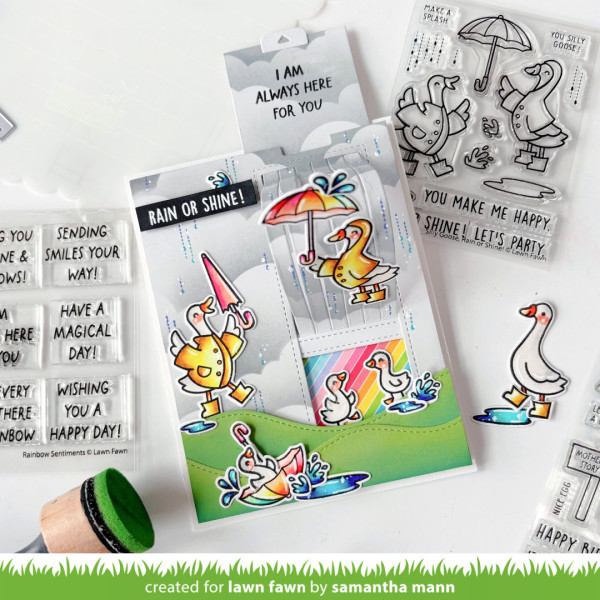
Samantha’s adorable interactive card features stamped ducks having fun in the rain. When the tab is pulled the grey rain arches up to show rainbow pattern paper underneath. She also used those rainbow colors on the umbrellas using Zig Clean Color Markers. Watch her video tutorial on the Lawn Fawn blog.
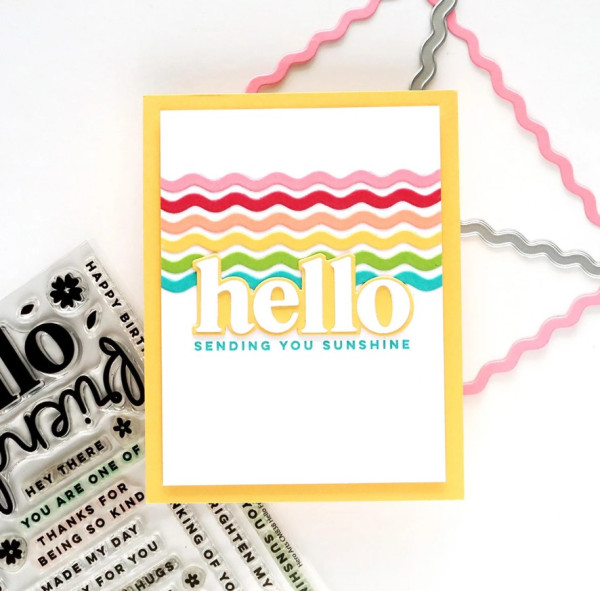
Kelly’s creative card uses a squiggly frame die, cut from a rainbow of colors and trimmed into strips to form colorful stripes. There’s a yellow card base and yellow backing on the “Hello” die cut sentiment and she finished the sentiment with some teal stamping. Find more info at the Hero Arts blog.
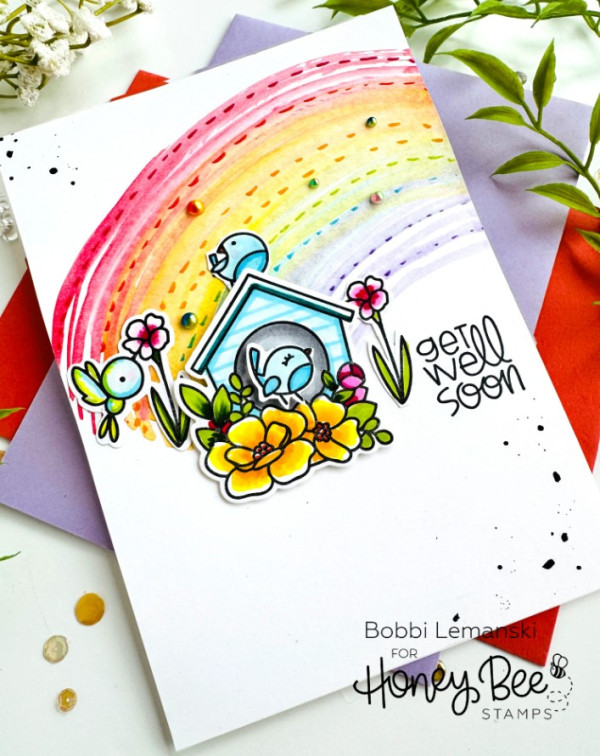
Bobbi’s wonderful Get Well card has sweet stamped birds, a birdhouse and flowers with an amazing rainbow behind. She created it using watercolors, letting each color fade into the next and then used Copics to add some dash lines, it’s a beautiful way to create your own rainbow. Find all the details at the Honey Bee Stamps blog.
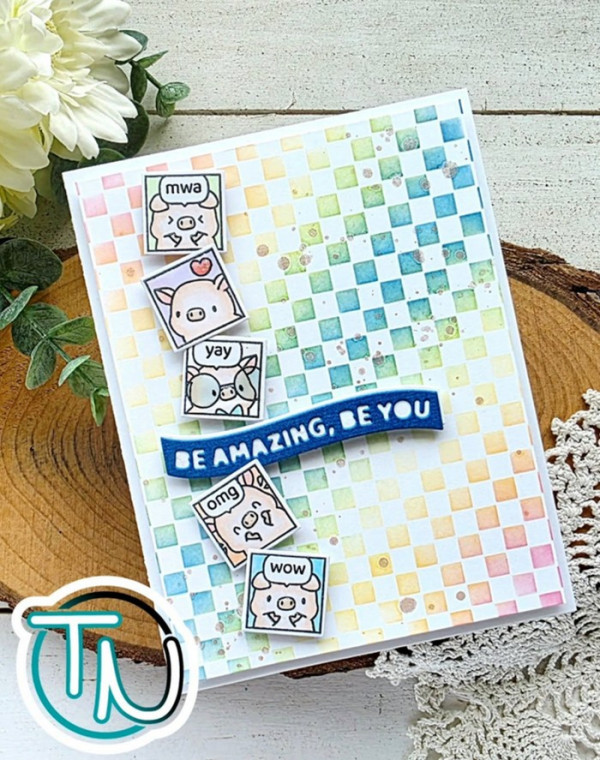
Amanda created a cool background using a checked stencil and a rainbow of inks at a diagonal. She added adorable stamped piggies in squares down one side and a wavy die cut dark blue sentiment that really pops. Take a closer look at the Mama Elephant blog.
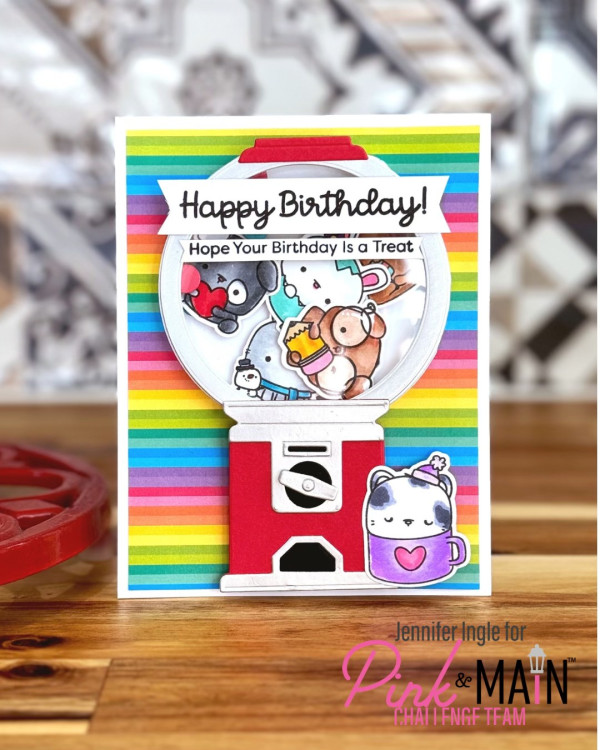
Jennifer’s darling Birthday card has a large die cut gumball machine shaker that’s filled cute stamped animals, tucked behind clear acetate. Using striped rainbow pattern paper is an easy way to create a quick rainbow pattern that adds lots of color for a cute card background. Take a closer peek at the Pink and Main blog.
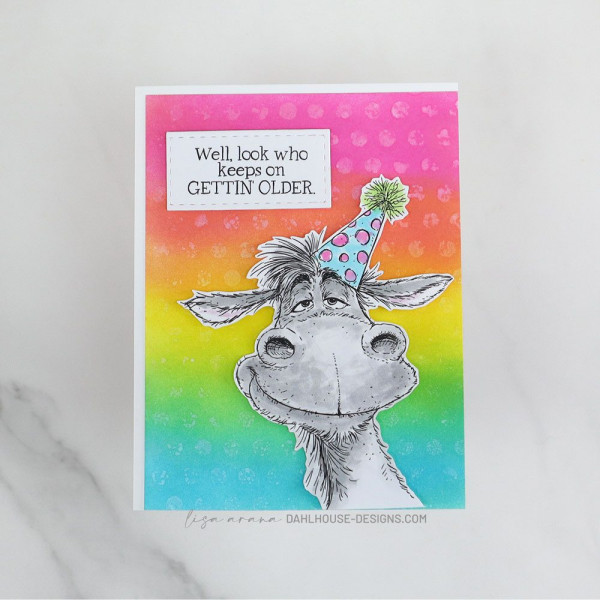
Lisa used Distress Inks and ink blending for her colorful background on this goofy donkey birthday card. She used a polka dot background stamp spritzed with water and pressed it onto the inks to add a subtle texture too. The soft greys of the stamped donkey work so well not to compete with the bold background. Learn more at the Unity Stamps blog.
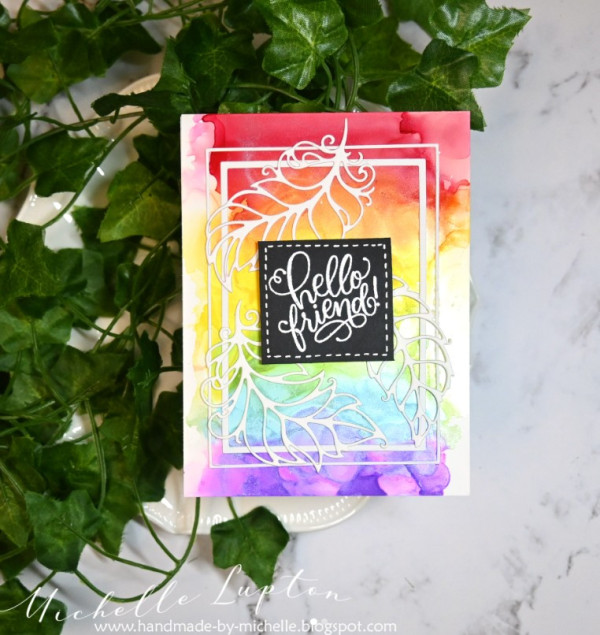
Michelle created her stunning card background using Alcohol Pearls which is an alcohol based liquid with color and a bit of pearly shimmer that blends really well on slick surfaces. Overtop she added a thin double frame and lacey feathers die cut from white cardstock along with a white heat embossed sentiment on black. I spotted this idea at her Michelle Lupton Instagram page.
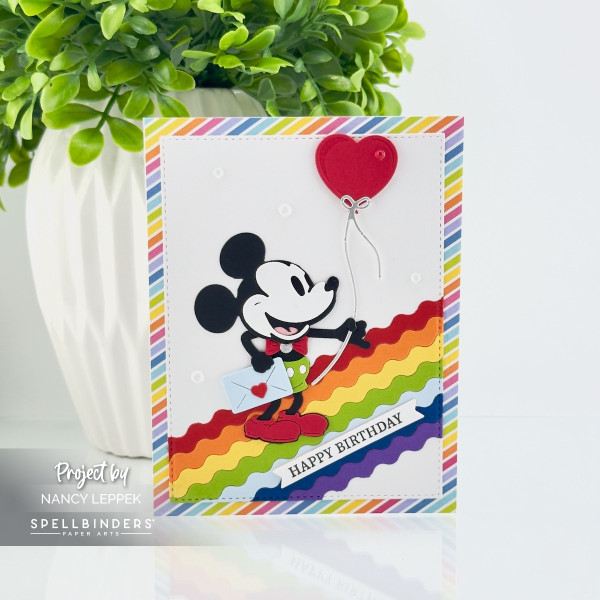
Nancy’s cute Mickey Mouse Birthday card uses dies from Spellbinders with a wavy rainbow of ric rac faux ribbon die cut in all the colors of the rainbow. She also used a rainbow card base to really lean into that cool rainbow vibe. Find more details on the Scrapper at Heart blog.
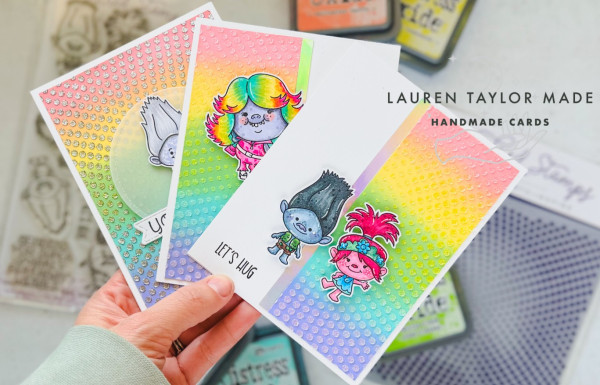
Lauren made a trio of Troll inspired cards using stamps from Kindred. Her wonderful rainbow backgrounds were created using Distress Oxide Inks to ink blend and then she placed a circular dotted stencil overtop and applied a glitter stencil paste for loads of color and shine! Find all the info at the Lauren Taylor Made blog.
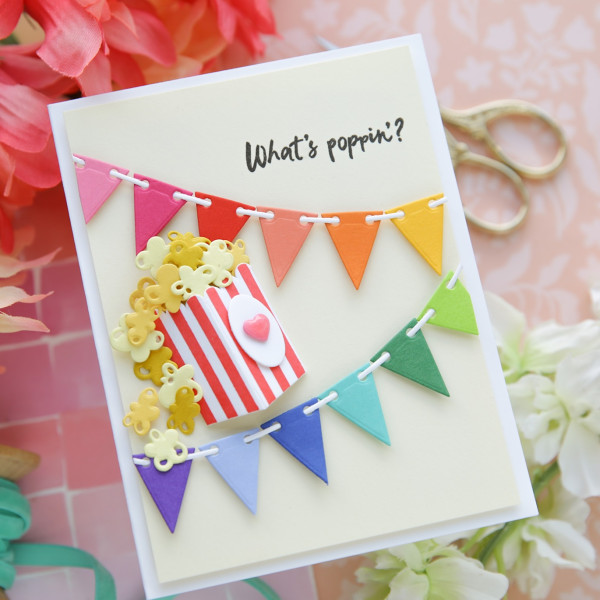
Laura created a rainbow on her die cut banners on this yummy Popcorn card. Cutting each flag from different cardstocks she threaded them and added two rows across the card including a die cut popcorn bucket and the puny stamped sentiment. Watch her video tutorial at the Simon Says Stamp blog.
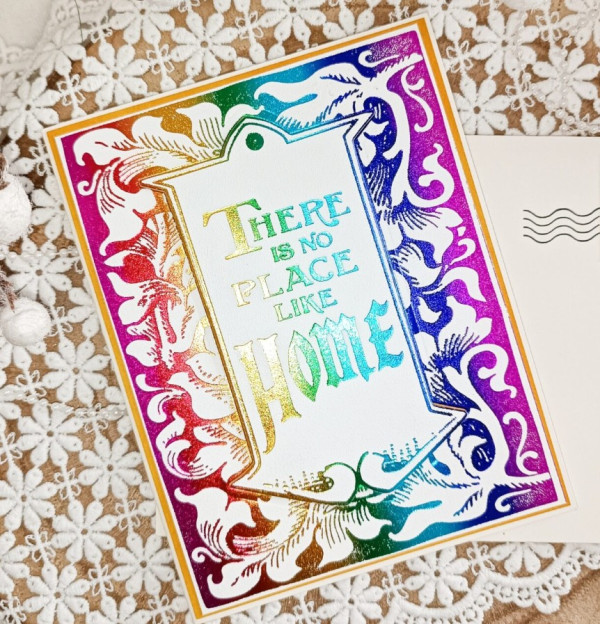
Teresa’s fabulous card used rainbow foil to add lots of shine to a large quote with a fancy frame from the Wizard of Oz. She used a letterpress system to apply the design with a plate which leaves the “negative” area left over from the foil that she used to make a second card, it’s a great no waste method! Learn all about it at the Graphic 45 blog.
I hope you’ve been inspired to experiment with all the colors of the rainbow on your next card project.
-Heather
Find Distress Inks at Ranger Ink