• Home
  • Suggest A DIY
  • DIY Newsletter

Card Making

News, techniques and inspirations

  • About CraftGossip
  • Our Network
    • Bath & Body Crafts
    • Candle Making Ideas
    • Crochet Ideas
    • Cross Stitch
    • Edible Crafts
    • Felting Patterns
    • Glass Art
    • Home & Garden Ideas
    • Indie Crafts
    • Jewelry Making
    • Kids Crafts
    • Knitting Patterns
    • Lesson Plans
    • Needlework
    • Party Ideas
    • Polymer Clay
    • Quilting Ideas
    • Recycled Crafts
    • Scrapbooking
    • Sewing Patterns
    • Card Making
    • DIY Weddings
    • Not Craft Ideas
  • Giveaways
  • Roundups
  • Store
  • Search

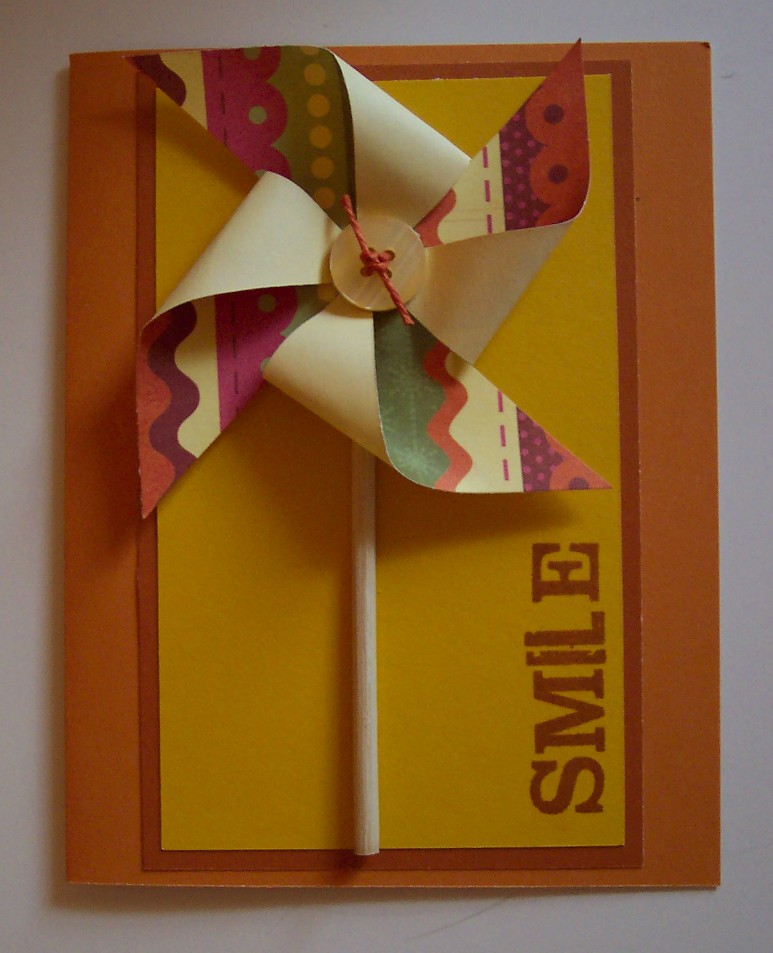
Project: Pin Wheel Card

July 22, 2009 by Heather Holbrook

image by Heather Holbrook

image by Heather Holbrook

I wanted to share with you the instructions for this fun Pin Wheel Card I made recently.
 
Supplies:
cardstock: yellow, rust, orange
double-sided pattern paper 3″x 3″
button
string
small dowel, stick or skewer 3 1/2″ long
“smile” stamp (from Close To My Heart “April Word Puzzle” set)
rust ink pad
large glue dots
foam squares
 
Directions:
-cut orange cardstock in half and fold in half for card base
-trim rust cardstock to 5 1/4″ x 3 1/4″ and trim yellow cardstock to 5″ x 3″ and adhere both to card base
-stamp “smile” word with rust ink onto yellow cardstock
-turn patterned paper over to backside and draw an X with a pencil from corner to corner, cut along all four lines about half way towards the center of the X (see picture below)
-turn cut patterned paper over and apply a glue dot in the center, fold down every other point and adhere in the middle (see photo below)
-tie string through button holes and adhere button to middle of pin wheel
-glue stick to center of card
-apply foam squares to back of pin wheel and adhere to card front on top of stick
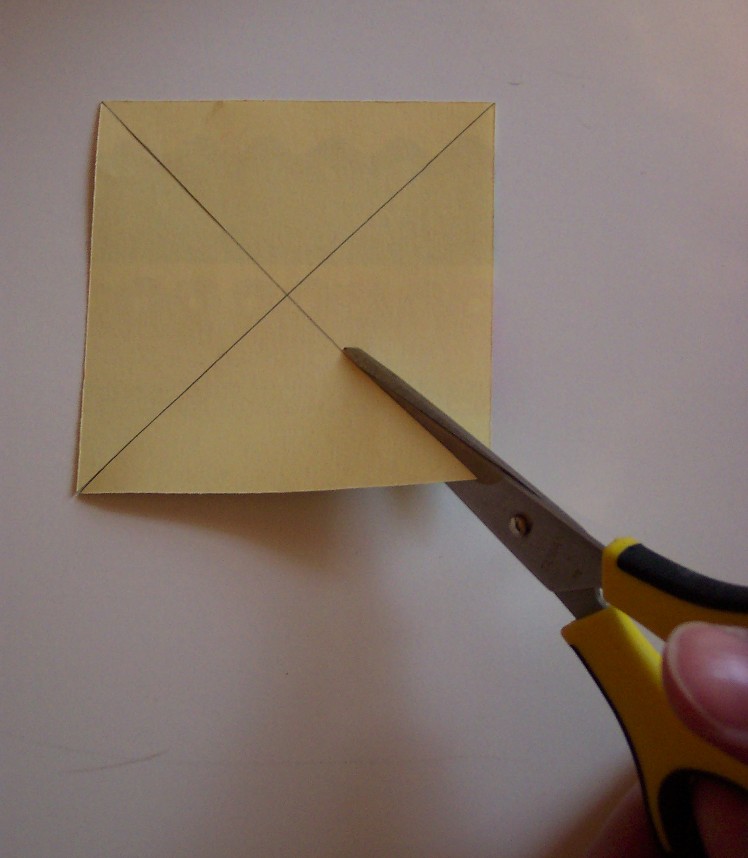
 
image by Heather Holbrook
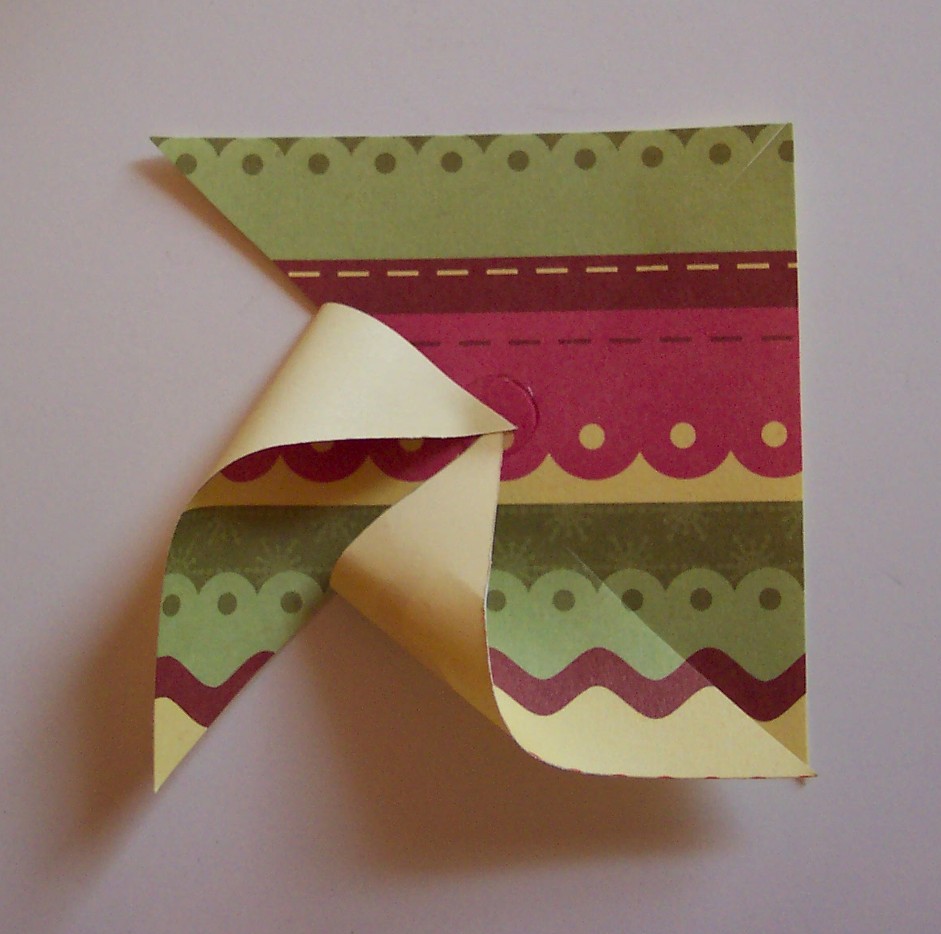
image by Heather Holbrook

image by Heather Holbrook

image by Heather Holbrookimage by Heather Holbrook
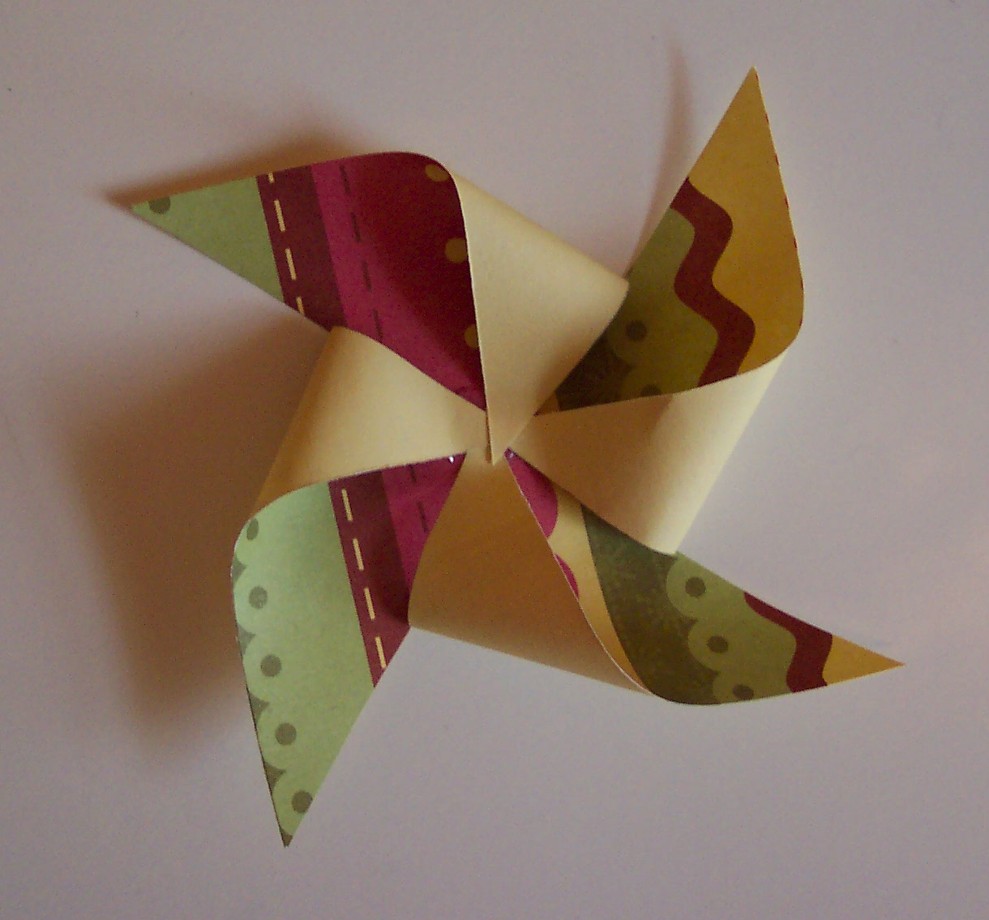
 

image by Heather Holbrook

image by Heather Holbrook

Hope you try out this fun card for yourself!
-Heather
«
»

Comments

  1. Gwen Tippie says

    July 26, 2009 at 1:13 pm

    Love, Love, Love your windmill. Thanks for the directions.

    Gwen

Have you read?

12+ Beautiful Butterfly Card Ideas

12+ Beautiful Butterfly Card Ideas

Brenda’s stunning card features a layered purple butterfly that looks ready to fly off the card. It’s sitting among lavender and carnation flowers that she die cut, adding details with Copic markers and a white gel pen. There’s layers of … Read More ...

Categories

3d alcohol markers altered art birthday cards christmas cards coloring pages copic markers Die Cutting digital stamps distress Explosion Halloween heat embossing ink sprays interactive cards mixed media pop up card slimline valentines day water color

RSS More Articles

  • Cute Little Backpack Knitting Patterns
  • Easy Pen and Paper Games for Road Trips and Beyond
  • Handmade Pretend Play Food Ideas For Kids’ Kitchens, Classrooms And Crafty Grandparents
  • Air-Dry Clay Sunflower Trinket Dish Tutorial
  • Beginner-Friendly Crochet Scarves and Cowls
  • Satisfying Adult Snacks That Crush Cravings and Boost Energy
  • 30 Jumpsuits You Can Sew Yourself – From Effortless Weekend Wear to Showstopping Styles
  • You Won’t Believe These 20 Upcycled Bar Tables and Carts – From Trash to Tipsy
  • Young Lady in a Hammock Hand Embroidery Pattern – Etsy Review
  • Crafty Themed Mini Scrapbook Album

Pick Your Blog

  • Sewing
  • Knitting
  • Quilting
  • Crochet
  • Home & Garden
  • Recycled Crafts
  • Scrapbooking
  • Card Making
  • Polymer Clay
  • Cross-Stitch
  • Edible Crafts
  • Felting
  • Glass Art
  • Indie Crafts
  • Kids Crafts
  • Jewelry Making
  • Lesson Plans
  • Needlework
  • Bath & Body
  • Party Ideas
  • Candle Making
  • DIY Weddings
  • Not Craft
  • Free Craft Projects

Copyright © 2026 · CraftGossip | Start Here | Contact Us | Link to Us | Your Editors | Privacy and affiliate policy